iPhone photography has come a long way since its inception in 2007. With the advanced camera system of the iPhone 13 Pro Max, capturing stunning photos has never been easier. In this article, I will guide you through some tips and techniques to help you maximize the camera capabilities of your iPhone 13 Pro Max and take your photography skills to new heights.
Key Takeaways:
- Understand the different lenses of the iPhone 13 Pro Max and how to use them effectively.
- Take advantage of the ProRAW format for enhanced editing capabilities.
- Define your photographic style using the Photographic Styles feature.
- Experiment with disabling automatic Night Mode for more control over night shots.
- Explore the possibilities of macro photography with the ultrawide lens.
Familiarize yourself with the iPhone Pro lenses
The iPhone 13 Pro Max is equipped with three powerful lenses that can take your photography to the next level. Understanding the capabilities of each lens will allow you to capture a wide range of shots and unleash your creativity. Let’s take a closer look at these lenses:
- Main Camera: The 48MP main camera is the default lens on the iPhone 13 Pro Max. It offers excellent image quality and is perfect for capturing everyday moments with clarity and detail.
- Wide-Angle Lens: The wide-angle lens allows you to capture expansive scenes, such as landscapes or group photos. It offers a wider field of view, allowing you to fit more into the frame.
- Telephoto Lens: The telephoto lens is ideal for zooming in on distant subjects or objects that are far away. It allows you to get closer to the action without compromising image quality.
By familiarizing yourself with these lenses and understanding their unique features, you’ll be able to choose the right lens for different situations and capture stunning photos with your iPhone 13 Pro Max.
“Understanding the capabilities of each lens will allow you to capture a wide range of shots and unleash your creativity.”
Familiarize yourself with the iPhone Pro lenses
Understanding the capabilities of the lenses on your iPhone 13 Pro Max is essential for capturing professional-quality photos. This device comes equipped with three lenses: a 48MP main camera, a wide-angle lens, and a telephoto lens. Each lens serves a specific purpose, allowing you to capture a wide range of shots with precision and clarity.
The wide-angle lens is perfect for capturing expansive scenes, such as landscapes or group photos, as it allows you to fit more into the frame. On the other hand, the telephoto lens is ideal for zooming in on distant subjects, such as wildlife or sporting events, to capture more detail and bring the subject closer to you.
To make the most of these lenses, it’s important to experiment with different angles and distances. Get closer to your subject for detailed shots, or step back to include more elements in your composition. By familiarizing yourself with the iPhone 13 Pro Max lenses and their capabilities, you can unleash your creativity and capture stunning photos.
Table: iPhone 13 Pro Max Lenses
| Lens | Features |
|---|---|
| Main Camera | 48MP resolution |
| Wide-Angle Lens | Expansive scene capture |
| Telephoto Lens | Zooming capabilities |
By utilizing the different lenses on your iPhone 13 Pro Max, you can capture a wide range of subjects and create visually exciting photographs. Experiment with different compositions, angles, and distances to unleash your creativity and take your photography to the next level.
Fine-tune your photographic style with Photographic Styles
The iPhone 13 Pro Max offers a range of features and settings to help you capture stunning photos. One feature that allows you to define a unique visual style is Photographic Styles. With preset styles like Rich Contrast, Vibrant, Warm, and Cool, you can create a signature look for your photos. By adjusting the tone and warmth sliders, you can further customize the style to your preference. This feature is a great way to add a consistent aesthetic to your photographs and showcase your artistic vision.
Experiment and refine your style
By exploring different Photographic Styles and experimenting with various combinations of sliders, you can refine your photographic style and create a cohesive portfolio of images. Whether you prefer bold and vibrant colors or a more muted and atmospheric look, Photographic Styles allows you to easily achieve the desired effect.
Additionally, you can create your own custom style by adjusting the individual settings manually. This gives you complete control over the tone curve, color balance, and other parameters, empowering you to create a truly unique style that reflects your artistic vision.
| Photographic Style | Description |
|---|---|
| Rich Contrast | Enhances the contrast and dynamic range of your photos, resulting in a more dramatic look. |
| Vibrant | Boosts the saturation and vibrancy of colors, making your photos more eye-catching and lively. |
| Warm | Adds a warm tone to your photos, creating a cozy and inviting atmosphere. |
| Cool | Enhances the cool tones in your photos, giving them a refreshing and serene feel. |
By utilizing the Photographic Styles feature on the iPhone 13 Pro Max, you can achieve a consistent and visually appealing look across your photographs. Whether you’re capturing landscapes, portraits, or everyday moments, exploring and defining your unique style will take your iPhone photography to the next level.
Optimize night shots by disabling automatic Night Mode
When it comes to capturing stunning night shots with your iPhone 13 Pro Max, disabling automatic Night Mode can give you more control and better results. While Night Mode is a great feature for low-light photography, there are situations where you may want to avoid its automatic activation. By turning off this feature in your camera settings, you can manually enable Night Mode when needed, ensuring that you have full control over your night shots.
Disabling automatic Night Mode allows you to avoid potential issues such as unwanted blurriness or unnatural lighting. Sometimes, the automatic Night Mode may not accurately detect the lighting conditions and apply excessive processing, resulting in less desirable outcomes. By taking control of when Night Mode is activated, you can carefully assess the lighting conditions and make a more informed decision on whether to use it or not.
To disable automatic Night Mode on your iPhone 13 Pro Max, simply open the camera app and tap on the Night Mode icon at the top of the screen. This will bring up a menu where you can choose between “On,” “Off,” or “Auto.” Selecting “Off” will disable automatic Night Mode, allowing you to manually enable it when needed by tapping the Night Mode icon again.
Remember that every photography situation is unique, and experimenting with different settings and techniques is the key to achieving the best results. By disabling automatic Night Mode and taking control of your night shots, you can unleash your creativity and capture stunning images with your iPhone 13 Pro Max.
Optimizing night shots manually
When you disable automatic Night Mode, it’s important to understand how to optimize your night shots manually. Here are a few tips to help you get started:
- Adjust your exposure: In low-light conditions, your iPhone’s camera may default to a longer exposure time to capture more light. Adjusting the exposure manually can help you achieve the desired brightness and reduce the risk of overexposure.
- Use a tripod or stabilize your phone: Night shots often require longer exposure times, which can result in motion blur if your phone is not stable. Using a tripod or stabilizing your phone against a solid surface can help you capture sharp, clear images.
- Experiment with different settings: Don’t be afraid to explore the various settings and modes on your iPhone 13 Pro Max’s camera. From adjusting the white balance to experimenting with different ISO and shutter speed settings, finding the right combination for your specific night shot can make a big difference.
| Pros of disabling automatic Night Mode | Cons of disabling automatic Night Mode |
|---|---|
| Greater control over lighting and exposure | Requires manual activation of Night Mode |
| Avoids potential issues such as blurriness or unnatural lighting | May require additional time and effort to adjust settings |
| Opportunity to experiment and get creative with night photography | Requires a good understanding of manual camera settings |
Remember, photography is all about experimentation and finding what works best for you. By disabling automatic Night Mode and taking control of your night shots, you can elevate your iPhone 13 Pro Max photography and capture stunning images in low-light conditions.
Explore the possibilities of macro photography
The iPhone 13 Pro Max offers a wide range of camera features that allow you to capture stunning photographs. One of the most exciting features is the built-in ultrawide lens with macro focusing capabilities. With this lens, you can capture detailed close-up shots of small subjects, such as flowers, insects, and intricate textures. Macro photography opens up a whole new world of creative possibilities, allowing you to discover the beauty in the smallest of details.
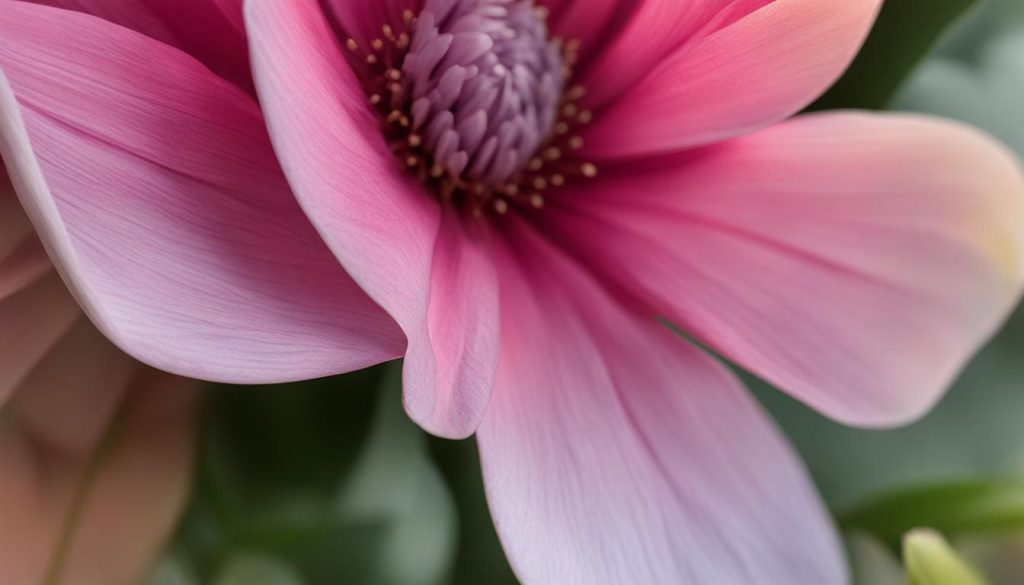

To activate the macro mode on your iPhone 13 Pro Max, you have two options. You can either enable it in the camera settings, or you can simply get close to your subject and double-tap the screen to adjust the magnification. This convenience makes it easy to switch between regular and macro photography, giving you the flexibility to capture both wide-angle scenes and close-up details without the need for additional lenses.
Exploring the possibilities of macro photography with your iPhone 13 Pro Max is both fun and rewarding. You’ll be amazed at the level of detail you can capture and the unique perspectives you can achieve. Whether you’re photographing nature, everyday objects, or even food, macro photography allows you to showcase the intricate beauty that often goes unnoticed.
Capture Cinematic Videos with Cinematic Mode
The iPhone 13 Pro Max’s Cinematic mode is a powerful tool for creating professional-looking videos with depth of field effects. By adjusting the focus during filming and creating smooth transitions between focus points, you can add visual interest and a cinematic feel to your videos. To access Cinematic mode, open the Camera app and select the video recording mode. You will see the Cinematic mode icon at the top of the screen.
Experimenting with different focus techniques and exploring the various settings of Cinematic mode can elevate your video capabilities. You can capture stunning footage with a shallow depth of field, blurring the background while keeping the subject in sharp focus. This technique can create a professional look and make your videos more visually appealing. Whether you’re capturing a memorable moment or creating content for social media, Cinematic mode on the iPhone 13 Pro Max allows you to take your videos to the next level.
Quick Tips for Using Cinematic Mode:
- Experiment with different subject distances and movements to create dynamic shots.
- Use manual focus adjustments to highlight specific elements within the frame.
- Take advantage of the smooth transitions between focus points for a seamless visual experience.
- Combine Cinematic mode with other camera features, such as slow motion or time-lapse, to add additional creative elements to your videos.
Remember to practice and experiment with different techniques to find what works best for your specific video projects. With the iPhone 13 Pro Max’s Cinematic mode, you can capture stunning videos that rival the quality of professional cinematography.
Table:
| Pros | Cons |
|---|---|
| Creates a professional look with depth of field effects | May require practice and experimentation to master |
| Smooth transitions between focus points | May require additional editing to fine-tune focus points |
| Enhances the visual appeal of videos | Requires good lighting conditions for optimal results |
Tips for Editing Depth of Field and Focus in Post-Production with Cinematic Mode
When it comes to creating captivating videos on your iPhone 13 Pro Max, Cinematic mode offers a fantastic array of features. One of its unique advantages is the ability to edit depth of field and focus points after recording a video. This post-production editing capability allows you to refine and enhance your videos, adding that extra touch of creativity and professionalism.
With Cinematic mode, you can adjust the level of background blur, known as bokeh, to create a more visually appealing composition. This feature enables you to highlight your subjects by blurring the background, resulting in a professional-looking video that draws attention to the main focal point. By customizing the depth of field, you can evoke different moods, emphasize specific elements, or convey a sense of depth in your videos.
Additionally, in post-production, you can change the focus points within the video for added impact. This means that you can shift the viewer’s attention and guide their gaze throughout the footage. By altering the focus points, you can create dynamic and engaging videos that showcase different elements at different times, captivating your audience and telling a compelling visual story.
To access the editing options for depth of field and focus in post-production, simply open the video in your preferred editing app. You’ll be able to fine-tune the level of background blur, adjust the focus points, and experiment with different visual effects. This feature gives you greater control over the final result, allowing you to refine your videos and achieve the desired look and feel.
By leveraging the editing capabilities of Cinematic mode, you can take your videos to the next level, adding a professional touch to your visual storytelling. So, don’t hesitate to explore and experiment with depth of field and focus adjustments in post-production, and watch as your videos become more captivating and visually impressive.
Utilize Live Photo for long exposure effects
One of the exciting features of the iPhone 13 Pro Max is Live Photo, which allows you to capture short videos that can be transformed into stunning long exposure images. This functionality opens up a world of creative possibilities, enabling you to achieve artistic effects such as light trails or blurred motion. By selecting a Live Photo and applying long exposure effects during editing, you can create DSLR-like results with your iPhone.
Experimenting with Live Photo and long exposure techniques is easy. Simply find a subject with movement or interesting lighting, and capture a Live Photo. Once you have captured the Live Photo, you can access the editing options and apply the long exposure effect. The camera app analyzes the video frames and combines them into a single image, resulting in a stunning long exposure shot.
Whether you want to capture the serene flow of a waterfall, the streaking lights of passing cars, or the mesmerizing movement of a dancer, Live Photo’s long exposure effects provide a creative outlet for your iPhone photography. This feature allows you to capture the passage of time in a single image, adding a sense of drama and motion to your photos.
Next time you come across a scene that would benefit from a long exposure effect, remember to utilize Live Photo on your iPhone 13 Pro Max. With this feature, you can elevate your photography to a new level and create captivating images that will impress your friends and followers.
Create shortcuts for quick access to the camera app
If you’re an iPhone 13 Pro Max user, you know how important it is to capture spontaneous moments without delay. Thankfully, you can streamline your photography experience by creating shortcuts for quick access to the camera app. This simple process will save you time and ensure that you never miss a photo opportunity. So, let’s dive into how you can customize and organize your camera shortcuts.
Customizing camera shortcuts
To create camera shortcuts on your iPhone 13 Pro Max, follow these steps:
- Go to your iPhone’s settings and scroll down to “Accessibility”.
- Tap on “Accessibility” and then select “Touch”.
- Scroll down and find “Back Tap”.
- Tap on “Back Tap” and choose either “Double Tap” or “Triple Tap”.
- Select “App” and scroll down to find “Camera”.
- Tap on “Camera” to assign it to the double or triple tap gesture.
Once you’ve customized your camera shortcuts, you can easily access the camera app by double or triple tapping the back of your iPhone. This intuitive and convenient feature will ensure that you’re always ready to capture those special moments.
Optimizing your workflow
By organizing your camera shortcuts, you can optimize your photography workflow even further. Consider grouping your most frequently used camera modes, such as Photo, Video, or Portrait, for quick and easy access. This way, you won’t have to navigate through different menus or options, saving you valuable time when capturing those spontaneous shots.
| Camera Shortcut | Assigned Gesture |
|---|---|
| Photo | Double Tap |
| Video | Triple Tap |
| Portrait | Double Tap |
| Panorama | Triple Tap |
Experiment with different camera shortcut configurations to find what works best for you. With a personalized setup, capturing high-quality photos and videos on your iPhone 13 Pro Max will be a breeze.
Recommended Camera Apps for Enhanced Photography
While the native camera app on the iPhone 13 Pro Max offers a range of features and settings, there are third-party camera apps available that can further enhance your photography experience. These apps provide advanced controls, customizable settings, and additional editing options, catering to the needs of both amateur and professional photographers.
One popular choice is Halide Mark II, a powerful camera app that offers manual controls such as ISO, shutter speed, and focus. It also provides in-depth exposure histograms and focus peaking, allowing you to fine-tune your shots with precision. With its intuitive interface and advanced features, Halide Mark II is a great tool for photographers looking to take full control of their iPhone’s camera.
Another notable app is ProCamera+, which offers a wide range of shooting modes and editing tools. It allows you to capture RAW photos, shoot in low-light conditions with its Night Mode, and even optimize your shots with its HDR and portrait modes. The app also includes advanced features like a built-in QR code scanner and the ability to manually adjust white balance and exposure. With ProCamera+, you can elevate your iPhone photography to new heights.
“These third-party camera apps provide advanced controls, customizable settings, and additional editing options, catering to the needs of both amateur and professional photographers.”
Exploring these third-party camera apps allows you to unlock new creative possibilities and expand your photography skills. Each app offers its own unique features and capabilities, so it’s important to find the one that best suits your style and preferences.
| Camera App Name | Key Features |
|---|---|
| Halide Mark II | Manual controls, exposure histograms, focus peaking |
| ProCamera+ | RAW photos, Night Mode, HDR, portrait mode |
By experimenting with these recommended camera apps and harnessing their advanced features, you can take your iPhone 13 Pro Max photography to the next level. Each app offers unique tools and capabilities that can help you capture stunning, professional-quality photos with ease.
Remember, the key to mastering photography with your iPhone 13 Pro Max is practice and creativity. So, don’t be afraid to explore different apps, techniques, and settings to discover your own unique photographic style.


Summary
- Third-party camera apps provide advanced controls, customizable settings, and additional editing options.
- Halide Mark II offers manual controls, exposure histograms, and focus peaking.
- ProCamera+ allows capturing RAW photos, shooting in low-light conditions with Night Mode, and optimizing shots with HDR and portrait modes.
- Explore these camera apps to unlock new creative possibilities and find the one that suits your style and preferences.
Conclusion
With the advanced camera system of the iPhone 13 Pro Max, capturing better photos has never been easier. By following these photography tips and techniques, you can take your iPhone photography to the next level.
Start by familiarizing yourself with the different lenses available on your iPhone 13 Pro Max. The wide-angle lens is perfect for capturing expansive scenes, while the telephoto lens allows you to zoom in on distant subjects. Understanding the capabilities of each lens will enable you to capture a wide range of shots.
Additionally, shooting in ProRAW format allows you to have greater flexibility during the editing process. By enabling ProRAW shooting in the camera settings, you can make detailed adjustments to exposure, color, and other settings, resulting in even more stunning photos.
Finally, don’t be afraid to explore the various features of your iPhone 13 Pro Max’s camera, such as Photographic Styles, Cinematic mode, and macro photography. Experimenting with these features will help you develop your own unique style and elevate your photography skills.
FAQ
How can I take better pictures with my iPhone 13 Pro Max?
Familiarize yourself with the iPhone Pro lenses, shoot in ProRAW for enhanced editing capabilities, define your photographic style with Photographic Styles, optimize night shots by disabling automatic Night Mode, explore the possibilities of macro photography, capture cinematic videos with Cinematic mode, edit depth of field and focus in post-production with Cinematic mode, utilize Live Photo for long exposure effects, create shortcuts for quick access to the camera app, and consider using recommended camera apps for enhanced photography.
How do I familiarize myself with the iPhone Pro lenses?
The iPhone 13 Pro Max comes with three lenses: a 48MP main camera, a wide-angle lens, and a telephoto lens. The wide-angle lens is great for capturing expansive scenes, while the telephoto lens is ideal for zooming in on distant subjects. Understanding how to use these lenses effectively will enhance your photography.
How do I shoot in ProRAW format?
To shoot in ProRAW format, enable ProRAW shooting in the camera settings. ProRAW preserves the maximum amount of image data for greater editing flexibility, allowing you to make detailed adjustments to exposure, color, and other settings during post-processing.
How can I define my photographic style with Photographic Styles?
The Photographic Styles feature on the iPhone 13 Pro Max allows you to define a specific visual style before taking a photo. With preset styles like Rich Contrast, Vibrant, Warm, and Cool, you can create a signature look for your photos. Adjusting the tone and warmth sliders further customize the style to your preference.
Should I disable automatic Night Mode for better night shots?
Disabling automatic Night Mode gives you more control over your night shots and helps you avoid unwanted blurriness or unnatural lighting. By turning off this feature in the camera settings, you can manually enable Night Mode when needed and ensure better results in low-light conditions.
How do I explore the possibilities of macro photography with the iPhone 13 Pro Max?
The iPhone 13 Pro Max’s ultrawide lens comes with a macro focusing feature, allowing you to capture detailed close-up shots of small subjects. To activate the macro mode, you can either enable it in the camera settings or get close to your subject and double-tap the screen to adjust the magnification.
How can I capture cinematic videos with Cinematic mode?
The iPhone 13 Pro Max’s Cinematic mode allows you to create professional-looking videos with depth of field effects. You can adjust the focus during filming, track subjects, and create smooth transitions between focus points. This feature is great for adding visual interest and a cinematic feel to your videos.
Can I edit depth of field and focus in post-production with Cinematic mode?
Yes, one of the advantages of Cinematic mode on the iPhone 13 Pro Max is the ability to edit depth of field and focus points after recording a video. In post-production, you can adjust the level of background blur and change the focus points to create a more dynamic and engaging video.
How can I utilize Live Photo for long exposure effects?
Live Photo on the iPhone 13 Pro Max allows you to capture short videos that can be transformed into long exposures. By selecting the Live Photo and applying long exposure effects in the editing options, you can achieve DSLR-like results with your iPhone.
How can I create shortcuts for quick access to the camera app?
To streamline your photography experience, you can create shortcuts on your iPhone 13 Pro Max for quick access to the camera app. This saves time and allows you to capture spontaneous moments without delay. Setting up camera shortcuts is a simple process and can be done through the iPhone’s settings.
Are there recommended camera apps for enhanced photography on the iPhone 13 Pro Max?
Yes, there are third-party camera apps available that can further enhance your photography experience. Apps like Halide Mark II and ProCamera+ provide advanced controls, customizable settings, and editing options that cater to the needs of professional photographers.

