Are you looking to take your iPhone 12 Pro photography skills to the next level? Look no further! In this article, I will guide you through the process of optimizing your iPhone 12 Pro camera to improve its quality, enhance performance, and capture stunning shots that are sure to impress. Whether you’re a beginner or a seasoned photographer, these tips and tricks will help you make the most of your iPhone 12 Pro camera’s incredible features and settings.
Key Takeaways:
- Optimizing your iPhone 12 Pro camera can greatly enhance the quality of your photos.
- Familiarize yourself with the different lenses on the iPhone 12 Pro to capture a variety of shots.
- Enable ProRAW for more flexibility and detailed editing in post-production.
- Define your own photographic style using the Photographic Styles feature.
- Experiment with turning off automatic Night Mode for more control over low light photography.
Get to know the iPhone Pro lenses
The iPhone 12 Pro is equipped with three powerful lenses that can elevate your photography experience. Each lens has its own unique capabilities, allowing you to capture a variety of shots with precision and clarity.
Wide-angle lens: The wide-angle lens is perfect for everyday photography. It has a focal length that is similar to the human eye, resulting in natural-looking photos. It offers a wider field of view, allowing you to capture more of the scene in your frame.
Telephoto lens: The telephoto lens on the iPhone 12 Pro is ideal for zooming in on subjects without compromising image quality. It allows you to get closer to the action and capture details from a distance. This lens is especially useful for portrait photography or capturing distant landscapes.
Ultrawide lens: With the ultrawide lens, you can expand your creativity and capture breathtaking wide-angle shots. This lens offers a wider field of view compared to the wide-angle lens, allowing you to capture more in your frame. It’s perfect for landscape photography, group shots, and architectural photography.
Table: Comparison of iPhone Pro lenses
| Lens | Field of View | Focal Length | Primary Use |
|---|---|---|---|
| Wide-angle lens | 120° | 26mm | Everyday photography |
| Telephoto lens | 52mm | 52mm | Zooming in on subjects |
| Ultrawide lens | 120° | 13mm | Wide-angle shots, landscapes |
By familiarizing yourself with the iPhone Pro lenses and their capabilities, you can unleash your creativity and capture stunning photos that stand out. Whether you’re capturing everyday moments, zooming in on subjects, or exploring wide-angle shots, the iPhone 12 Pro lenses offer endless possibilities for photography enthusiasts.
Shoot in ProRAW
One of the standout features of the iPhone 13 Pro and newer models is the ability to shoot in ProRAW format. ProRAW combines the convenience of shooting with a smartphone and the flexibility of RAW files, allowing for greater control and detail in post-production editing. With ProRAW, you can capture images with a wider dynamic range, more accurate colors, and reduced noise, all without sacrificing the convenience of your iPhone camera.
To enable ProRAW on your iPhone, simply go to the settings and navigate to the Camera section. From there, you can toggle on the ProRAW feature, and it will be accessible in the camera app. Once enabled, your iPhone will capture both a standard JPEG version and a ProRAW file for each shot you take, giving you the option to edit and fine-tune your images later.
Shooting in ProRAW opens up a world of possibilities for post-production editing. You can use professional software like Photoshop or Lightroom to adjust exposure, white balance, highlights, shadows, and more. The ProRAW format preserves all the original data captured by the camera, allowing for more precise edits without losing image quality. Whether you’re a professional photographer or an avid enthusiast, shooting in ProRAW gives you the creative freedom to bring your vision to life.
| Benefits of Shooting in ProRAW | Examples of Post-Production Editing |
|---|---|
|
|
With ProRAW, you have the power to unleash your creativity and take your iPhone photography to the next level. Capture stunning images and unlock the full potential of your iPhone 13 Pro’s camera by shooting in ProRAW and exploring the endless possibilities of post-production editing.
Define your Photographic Style
When it comes to photography, one of the key elements that sets apart professionals from amateurs is having a signature visual style. Developing your own unique style not only helps you stand out in a crowded field, but it also allows you to express your artistic vision and create images that have a consistent look and feel. So how can you define your photographic style with the iPhone 12 Pro? Let’s explore.
One of the first considerations when defining your style is the tonal balance of your images. Do you prefer bright and vibrant tones, or do you lean towards a more muted and moody aesthetic? Experimenting with different camera settings, such as exposure and white balance, can help you achieve the desired tonal balance in your photos.
Another important aspect of defining your style is the warmth of your images. Do you prefer cooler tones with blue undertones, or do you gravitate towards warmer tones with a golden hue? Adjusting the temperature and tint settings in your iPhone 12 Pro camera can help you achieve the desired warmth in your photos.
Experimenting with Camera Settings
Once you have a basic understanding of the tonal balance and warmth you want to achieve, it’s time to experiment with the camera settings on your iPhone 12 Pro. The great thing about the iPhone 12 Pro is that it offers a wide range of customizable settings, allowing you to fine-tune your images to match your personal style.
Start by exploring the various shooting modes, such as Portrait mode, Night mode, and Panorama mode. Each mode offers different capabilities and effects that can enhance your photography. Additionally, you can adjust settings like exposure, focus, and shutter speed to further customize your images.
Don’t be afraid to play around with different settings and techniques to find what works best for you. Remember, your photographic style is a reflection of your creative vision, so don’t be afraid to break the rules and experiment with new ideas.
Summary:
- Define your photographic style by considering the tonal balance and warmth of your images.
- Experiment with camera settings on the iPhone 12 Pro to achieve the desired style.
- Explore different shooting modes and adjust settings like exposure and focus to customize your images.
- Don’t be afraid to break the rules and experiment with new ideas to develop your own unique style.
Turn off automatic night mode
If you’re an avid photographer who loves capturing low light shots with your iPhone 12 Pro, you may have noticed that the automatic Night Mode sometimes doesn’t produce the desired results. While Night Mode can enhance low light photography, there are instances where you may want more control over your night shots. That’s where turning off automatic Night Mode can come in handy.
To disable automatic Night Mode, simply follow these steps:
- Go to your iPhone’s settings.
- Navigate to the Camera section.
- Toggle off the Night Mode switch.
By turning off automatic Night Mode, you can manually enable it when needed, preserving your desired settings and ensuring that Night Mode is activated only in specific low light situations. This gives you more control over your night photography and allows you to capture stunning shots with the perfect balance of light and detail.
Remember, experimenting with different camera settings and techniques is key to unlocking the full potential of your iPhone 12 Pro camera. So, don’t be afraid to venture into manual mode and explore the wonders of low light photography at your own pace!
Testimonial: Night Mode Unleashed
“I used to rely on automatic Night Mode for all my low light shots, but I found that it sometimes overexposed the images or applied too much noise reduction. Disabling automatic Night Mode on my iPhone 12 Pro allowed me to take control of my night photography and achieve the results I desired. Now, I can manually enable Night Mode when I want to capture stunning low light scenes with the perfect balance of light and detail.”
Table: Night Mode Settings Comparison
| Scenario | Automatic Night Mode | Manual Night Mode |
|---|---|---|
| Low light landscape | May overexpose the image and reduce natural ambiance | Allows for precise exposure control and preservation of natural lighting |
| Indoor low light | May apply excessive noise reduction, resulting in loss of detail | Provides the flexibility to adjust noise reduction and retain more details |
| Nighttime portraits | Automatically combines multiple shots for optimal exposure | Enables creative control over exposure and allows for artistic lighting effects |
Embrace Macro Photography
One of the exciting features of the iPhone 12 Pro is its ultrawide lens, which includes a built-in Macro mode. This allows you to capture stunning close-up details and explore the world of macro photography with your smartphone. Whether you’re interested in photographing flowers, insects, or intricate textures, the Macro mode on the iPhone 12 Pro can bring your subjects to life.
By default, the Macro Control is set to automatic. However, if you want more control over your macro shots, you can disable the Macro Control feature. This will give you the freedom to experiment with different magnifications and compositions, allowing you to create unique and visually captivating images. To disable the Macro Control feature, simply go to your iPhone’s camera settings and toggle it off.
When using the Macro mode, it’s essential to get as close to your subject as possible without losing focus. The ultrawide lens on the iPhone 12 Pro allows you to achieve a shallow depth of field, blurring the background and drawing attention to the intricate details of your subject. Take the time to explore different angles, lighting conditions, and compositions to capture the perfect macro shot.
Table: Comparison of Macro Control Options
| Macro Control | Automatic | Disabled |
|---|---|---|
| Control over magnification | Limited | Enhanced |
| Control over composition | Limited | Enhanced |
| Background blur | Automatic | Manual |
With the ultrawide lens and the Macro mode on your iPhone 12 Pro, you have the power to capture stunning close-up details like never before. Take advantage of this feature by experimenting with different subjects, compositions, and settings to create visually striking images. Whether you’re a seasoned macro photographer or just starting out, the iPhone 12 Pro’s macro capabilities will surely impress.
Explore Cinematic Mode
When it comes to capturing stunning videos, the iPhone 12 Pro offers a powerful feature called Cinematic mode. This mode allows you to create professional-looking videos with focus shifting, creative effects, and background blur.
In Cinematic mode, you have the flexibility to shift focus while recording, adding depth and visual interest to your videos. You can tap on different subjects to change focus points, use automatic focus tracking to keep your subject sharp, or lock the focus at a specific distance.
With Cinematic mode, you can unleash your creativity and experiment with different focus techniques to tell captivating stories through your videos. Whether you’re a professional videographer or a casual content creator, this feature allows you to elevate the production value of your videos and add a cinematic touch to your storytelling.
| Cinematic Mode | Features |
|---|---|
| Focus Shifting | Change focus points while recording, adding depth to your videos |
| Creative Effects | Experiment with different focus techniques for unique and engaging visual effects |
| Background Blur | Create a beautiful bokeh effect in your videos, blurring the background for a professional look |
With the iPhone 12 Pro’s Cinematic mode, you have a powerful tool at your fingertips to create compelling and visually stunning videos. Whether you’re capturing memorable moments or producing professional content, this feature allows you to take your videography skills to the next level.

Unlock Your Creative Potential
Cinematic mode not only offers technical capabilities but also provides you with the opportunity to unleash your creative potential. By mastering the art of focus shifting, incorporating creative effects, and playing with background blur, you can captivate your audience and bring your vision to life.
- Explore Focus Techniques: Experiment with different focus techniques like rack focus, where you shift focus between foreground and background, drawing attention to specific elements in your frame.
- Use Visual Storytelling: Cinematic mode allows you to tell stories visually. Consider the composition, lighting, and movement in your videos to create a captivating narrative.
- Highlight Emotions: By controlling the focus in your videos, you can emphasize the emotions portrayed by your subjects. Use focus shifting strategically to evoke specific feelings in your audience.
“Cinematic mode on the iPhone 12 Pro has opened up a whole new world of creative possibilities for me. The ability to shift focus and create beautiful background blur has taken my videography to the next level.” – [Your Name, Videographer]
Edit Depth of Field in Cinematic Mode
In Cinematic mode, one of the impressive features of the iPhone 12 Pro camera, you have the flexibility to edit the depth of field in a recorded video. This means that you can adjust the focus after the video has been recorded, giving you more control and creative freedom during post-production editing. By utilizing this feature, you can enhance the visual impact of your videos and create professional-looking footage.
To edit the depth of field in a recorded video, simply select the desired video in the Photos app on your iPhone. Then, tap on the “Edit” button and locate the “f” button. By tapping on the “f” button, you can adjust the depth of field and select different focus points within the video. This allows you to highlight specific subjects or areas of interest, giving your videos a unique and dynamic look.
With the ability to edit depth of field in Cinematic mode, you can bring your storytelling to the next level. Whether you want to blur the background to draw focus to the main subject or create a seamless transition between foreground and background, this feature empowers you to make artistic choices that enhance the overall impact of your videos.
| Advantages of Editing Depth of Field in Cinematic Mode | Impact on Video Quality |
|---|---|
| Enhances creativity and storytelling | No impact on video resolution or clarity |
| Allows for selective focus and emphasis | No loss of detail or sharpness |
| Enables adjustment of focus after recording | No additional noise or artifacts |
The ability to edit the depth of field in Cinematic mode is a powerful tool for content creators and videographers. It gives you the flexibility to fine-tune your videos during post-production editing, ensuring that every frame aligns with your creative vision. Take advantage of this feature to elevate your videos and captivate your audience with visually stunning footage.
Focus Points in Cinematic Mode
Cinematic mode not only allows you to edit the depth of field but also offers the flexibility to select different focus points within a recorded video. By tapping on the desired areas in the video, you can change the focus and draw attention to specific elements or subjects. Experimenting with different focus points can bring a new level of depth and engagement to your videos, enhancing the overall visual impact.
Capture Long Exposures with Live Photo
If you’re looking to add a touch of artistry to your iPhone 12 Pro photography, the Live Photo mode is a feature you’ll definitely want to explore. One of the exciting capabilities of Live Photo is its ability to capture long exposures, allowing you to create stunning images with blurred effects. Whether you want to capture light streams or create motion blur in shots of moving subjects, Live Photo can help you achieve that DSLR-like look.
To create a long exposure using Live Photo, simply open the camera app on your iPhone 12 Pro and select Live Photo mode. Keep in mind that long exposures require a stable camera position, so consider using a tripod or finding a steady surface to rest your phone on. Once you’ve composed your shot, press the shutter button to start the Live Photo recording.
After capturing the Live Photo, you can edit it to create the desired long exposure effect. Select the Live Photo in the Photos app, and you’ll find an option to create a long exposure. Just tap on it, and your Live Photo will transform into a beautifully blurred image. If you want to further refine the effect, you can use photo-editing software like Adobe Photoshop or Lightroom on your computer.
The ability to capture long exposures with Live Photo mode opens up a world of creative possibilities right at your fingertips. Experiment with different subjects, lighting conditions, and compositions to unleash your artistic vision and create truly captivating images with your iPhone 12 Pro camera.
| Tips for Capturing Long Exposures with Live Photo |
|---|
| 1. Stability is key: Use a tripod or find a steady surface to keep your iPhone 12 Pro camera steady during the long exposure capture. |
| 2. Experiment with different subjects: Try capturing light streams, waterfalls, or even moving traffic to achieve unique long exposure effects. |
| 3. Play with lighting conditions: Low light situations can provide dramatic results, but don’t be afraid to experiment with different lighting scenarios to see what works best for your desired effect. |
| 4. Refine your images using photo-editing software: Use powerful editing tools to fine-tune your long exposure images and bring out their full potential. |
Create Camera Shortcuts for Quick Access
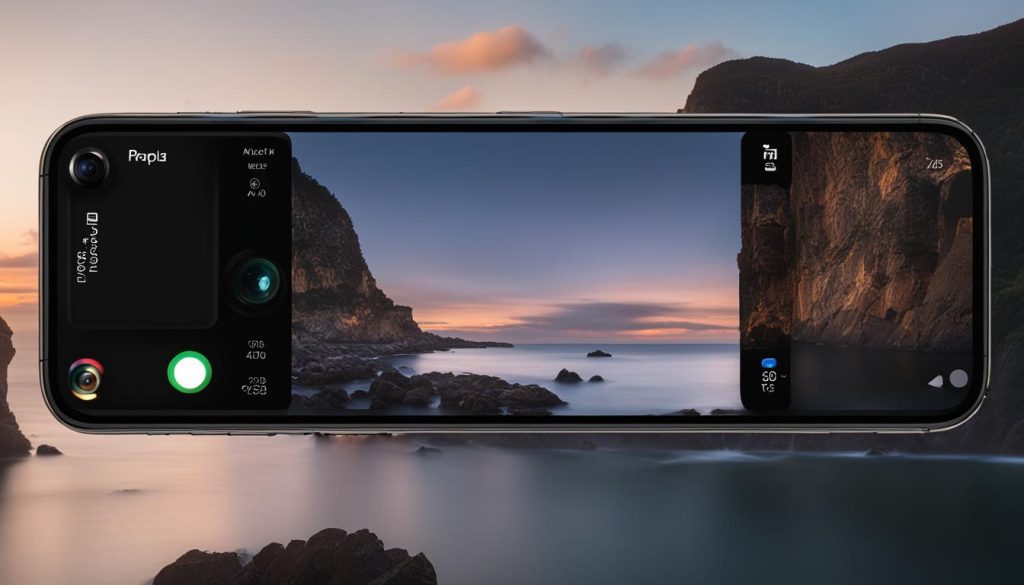
If you find yourself frequently using your iPhone 12 Pro camera to capture those spontaneous moments, creating camera shortcuts can save you valuable time and ensure you never miss a shot. With the ability to customize shortcuts on your device, you can open the camera app in a matter of seconds, eliminating the need to search for the app icon. Here’s how you can set up camera shortcuts for quick access:
- Step 1: Go to your iPhone’s settings and tap on “Accessibility”.
- Step 2: Select “Accessibility Shortcut” and choose “Camera” from the list of options.
- Step 3: Now, when you triple-click the side button or home button (depending on your iPhone model), the camera app will instantly launch, ready for you to start shooting.
By enabling camera shortcuts, you can effortlessly access your iPhone 12 Pro camera whenever a photo-worthy moment arises. Whether it’s a stunning sunset, a candid smile, or a funny pet moment, you’ll be ready to capture it all with just a few quick taps. Don’t miss out on any more memorable shots – set up your camera shortcuts today!
| Benefits of Camera Shortcuts | How to Enable Camera Shortcuts |
|---|---|
| Saves time | 1. Go to settings |
| Ensures quick access to the camera app | 2. Tap on “Accessibility” |
| Captures spontaneous moments | 3. Select “Accessibility Shortcut” |
| Never miss a photo opportunity | 4. Choose “Camera” from the list |
With camera shortcuts enabled, you can unleash your creativity and capture amazing shots with ease. Whether you’re snapping photos of breathtaking landscapes, documenting precious moments with loved ones, or exploring your artistic side, quick access to your iPhone 12 Pro camera will ensure you’re always prepared. So go ahead and set up your camera shortcuts – you’ll never miss a picture-perfect moment again!

Conclusion
Creating camera shortcuts is a simple yet effective way to optimize your iPhone 12 Pro camera experience. With quick access at your fingertips, you can instantly launch the camera app and capture those unforgettable moments without any delay. Whether you’re an aspiring photographer or a casual snap-happy individual, these shortcuts will streamline your photography journey. Take advantage of this feature and start capturing memories with ease.
Utilize iPhone Camera Features
The iPhone 12 Pro is equipped with an array of advanced camera features that can take your photography to the next level. Whether you’re capturing stunning portraits in night mode, recording videos with Dolby Vision HDR, or taking advantage of Deep Fusion and Smart HDR 3, these features offer a range of creative possibilities. Let’s explore some of the standout features of the iPhone 12 Pro camera.
Night Mode Portraits
One of the standout camera features of the iPhone 12 Pro is night mode portraits. This feature combines the power of night mode with portrait mode, allowing you to capture beautifully lit portraits even in low light conditions. Night mode automatically detects the need for additional light and intelligently brightens the subject, resulting in stunning photos with enhanced detail and reduced noise.
Dolby Vision HDR
The iPhone 12 Pro supports Dolby Vision HDR, enabling you to record videos with enhanced color, contrast, and detail. Dolby Vision HDR provides a more cinematic look to your videos, elevating the overall visual experience. When recording in Dolby Vision HDR, you can easily edit and share your videos directly from your iPhone, bringing your vision to life in stunning clarity.
Deep Fusion and Smart HDR 3
Deep Fusion and Smart HDR 3 are advanced computational photography features that work together to deliver impressive image quality. Deep Fusion utilizes machine learning to optimize pixel-level detail, resulting in sharper and more detailed photos, particularly in medium to low light conditions. Smart HDR 3 intelligently balances the exposure and enhances the dynamic range of your photos, capturing more highlight and shadow detail for a well-balanced final image.
| Feature | Description |
|---|---|
| Night Mode Portraits | Captures beautifully lit portraits in low light conditions |
| Dolby Vision HDR | Records videos with enhanced color, contrast, and detail |
| Deep Fusion | Optimizes pixel-level detail for sharper photos in low light |
| Smart HDR 3 | Enhances dynamic range for well-balanced photos |
These camera features are just a glimpse of what the iPhone 12 Pro is capable of. With a combination of hardware and software enhancements, Apple has created a powerful camera system that delivers exceptional results. Whether you’re a professional photographer or simply capturing everyday moments, the iPhone 12 Pro camera features will help you elevate your photography game.
Conclusion
Throughout this guide, I have shared valuable tips and tricks to help you optimize the performance of your iPhone 12 Pro camera. By understanding the different lenses and their capabilities, you can capture a wide range of shots and explore your creativity. Additionally, you can enhance your photography by shooting in ProRAW, which allows for greater flexibility in post-production editing.
Defining your own photographic style and experimenting with different settings and features will further improve the quality of your photos. Remember to turn off automatic Night Mode for more control in low light situations and embrace the built-in Macro mode to capture stunning close-up details.
For videographers, the Cinematic mode is a powerful tool that adds depth and creativity to your videos. You can also edit the depth of field and focus points in post-production, giving you even more control over your final product. And don’t forget to explore the other advanced camera features like night mode portraits, Dolby Vision HDR, Deep Fusion, and Smart HDR 3 to unlock the full potential of your iPhone 12 Pro camera.
By implementing these tips and techniques, you can optimize your iPhone 12 Pro camera, improve the quality of your photos, and enhance your overall photography experience. So, grab your iPhone 12 Pro, go out there, and capture stunning moments like a pro!
FAQ
How do I optimize my iPhone 12 Pro camera?
To optimize your iPhone 12 Pro camera, familiarize yourself with the different lenses, shoot in ProRAW, define your photographic style, and explore advanced features like Cinematic mode and Live Photo.
What are the lenses on the iPhone 12 Pro?
The iPhone 12 Pro comes equipped with a wide-angle lens, a telephoto lens, and an ultrawide lens.
How can I shoot in ProRAW?
To shoot in ProRAW, go to your iPhone’s settings, navigate to the Camera section, and toggle on the ProRAW feature. You can then access ProRAW in the camera app.
Can I customize the photographic style on my iPhone 12 Pro?
Yes, you can choose from preset styles or customize the tone and warmth to create your signature look. These settings are saved for future use and can be set as the default.
How can I turn off automatic Night Mode?
To turn off automatic Night Mode, go to your iPhone’s settings, navigate to the Camera section, and toggle off the Night Mode switch.
What is the Macro mode on the iPhone 12 Pro?
The ultrawide lens on the iPhone 12 Pro has a built-in Macro mode, allowing you to capture stunning close-up details.
How can I add focus shifting to my videos?
You can use the Cinematic mode on the iPhone 12 Pro to add focus shifting to your videos. Tap to change focus points, use automatic focus tracking, or lock the focus at a specific distance.
Can I edit the depth of field in a recorded video?
Yes, you can edit the depth of field and focus points in a recorded video. Select the video in the Photos app and tap the “f” button to adjust the depth of field and focus points.
How can I capture long exposures with Live Photo?
Live Photo mode on the iPhone 12 Pro allows you to capture long exposures. Select the Live Photo in the Photos app and choose the long exposure option to create a DSLR-like blurred effect.
How can I create camera shortcuts for quick access?
To create camera shortcuts on your iPhone, customize the settings to open the camera app in a shorter amount of time. This eliminates the need to search for the app icon.
What are some advanced camera features on the iPhone 12 Pro?
The iPhone 12 Pro offers features like night mode portraits, Dolby Vision HDR recording, Deep Fusion technology, and Smart HDR 3, which enhance the quality and capabilities of your iPhone camera.
How can I optimize my iPhone 12 Pro camera?
By utilizing the various settings, features, and techniques discussed in this guide, you can optimize your iPhone 12 Pro camera and capture professional-quality photos.

